Pages

Thursday, October 15, 2015

From Card to Layout

Every Sunday Studio Calico publishes 3 sketches - a layout sketch, a card sketch and a project life sketch.  A member of the Creative Team shares a project inspired by one of the sketches.  This week Celine Navarro used the card sketch to inspire a two page layout.

And she challenged everyone to take a sketch for one project type and use it to inspire another kind of project.  I found her layout really inspiring so I tried a layout with the card sketch as an inspiration.


Most of the supplies for this layout came from the Wink Wink scrapbook kit and the scrapbook add-on.  that black and white paper I used to create the angle is my favorite thing in the kits.  (I really don't care for the kits and think this is the only project I will be making with them, but I am really happy with it.)  I rubbed a gold ink pad lightly over the white embossed tag to add a bit of dimension and used one of the frames from the add-on to create a the base for the cluster at the bottom of the page.

Hope you've been finding time to play lately.  Thanks for stopping by.

Saturday, October 10, 2015

About A Special Boy

My nephew is an extraordinary child.  He faces many challenges but does it with a positive attitude, a smile and lots of love.  Every time I see him, I remember that it is most important to focus on our blessings.  So when the Crate Paper Wonder line came out, I knew I wanted to use this paper on a layout about him.


 I started with a sketch from My Creative Sketches.  It provided a great starting point but left me lots of room to create my own design.


Because I wanted the words on the patterned paper that provided my starting point, I replaced the banners with a piece of that paper.  Those words really tell the story about my nephew. 

I used die cuts and other papers from the Wonder line to build layers and tell my story.  Those felt hearts are the cutest thing ever!  And I used the red tag that slides into the glassine bag for journaling.  That way I could document his story while protecting his privacy. 

The challenge at My Creative Sketches is open til October 14th.  If you play along, link me up.  I'd love to see your layout.

Thanks for stopping by.


Thursday, October 8, 2015

Keeping It Soft

Last week I decided to do the sketch challenge at Citrus Twist Kits.  I loved the design and how the designer's (Chantal Phillipes)  interpretation was so soft and pretty.


I was determined to create a soft and pretty layout too.  And I finally managed (but it took me a couple of tries over the course of several days.


This was really a different approach for me.  I rarely start with a "feel" for a layout.  Instead I pull papers and pictures and see where they take me.  But I have to admit that I really like my final product.

What is your starting point?  Do you start with a "feel" for your project?

Thanks for stopping by.

Tuesday, October 6, 2015

Scraplift Sunday

Paper Issues posts a scraplift challenge every Sunday.  And last week's layout included my two favorite things - layers and a grid.  So you know I was in. 

This is the inspiration layout by Heather Joyce.  It is totally amazing  with all those bits and pieces.  


My version is simpler - I focused on a large layered photo block with a grid underneath. 

I started with my September Citrus Twist goodies and added from my stash.

I used my new favorite trick and trimmed from the top of the page so I kept the detail in the branding strip.  And I have to tell you - those arrows from Pink Paislee might be my new favorite thing. 

Thanks for stopping by.

Monday, October 5, 2015

World Card Making Day

Saturday was World Card Making Day.  It was also my daughter's homecoming dance.  As a result, I didn't have much time to play.  But I did crank out cards for the six challenges at Studio Calico.  They were all super quick and easy.....

Challenge 1: Use a project life card


I had been hoarding that stitched card forever and it was perfect for this challenge.

Challenge 2:  A fall card


It turns out that I have almost nothing fall like in my stash so this was a tough one.  That wood veneer piece from the last Pinkfresh Studio kit saved me.  And I did like the gold and copper against the dark blue background.

Challenge 3:  Use an alph stamp or alpha stickers 


This card was all about the colors.  Sometimes a simple design with great colors can have a big impact.

Challenge 4:  Use a stamp or die you haven't used before.


I rarely use my stamps and have gotten rid of tons (literally maybe) over the summer.  But this one I loved.  I went way out of my comfort zone with layered stamping, stamping on wood and even using watercolors for the sky.  It might just be my favorite card in the bunch.

Challenge 5 - Use at least two die-cuts


I used the scribble circle die from pinkfresh studios and a feather die from studio calico for this quick and easy card.  I like that it is so versatile and could be used in a number of situations.

Challenge 6:  a Christmas card that could be mailed easily and that is reproducable.


My original plan was to use gold heat embossing on the sentiment.  But after several tries, I couldn't get a result that left the word "twinkle" clear.  I did use an old trick here and chalk the edges of each layer.  It helps to give the illusion of dimension when you don't want to add thickness.


 Even though I didn't have much time to play, 6 cards was enough to remind me of all the reasons I enjoy card-making (even though I really consider myself a traditional scrapbooker.  Here are my top five reasons:

  1.  It's a great way to try new techniques - things are way less intimidating on a small scale project and I'm generally way less worried about "ruining" something.  I mean I actually used my watercolors on a project.........
  2. I use products that otherwise wouldn't ever get used - like that kite.  It was super cute but I wasn't sure I was ever going to use it.
  3.  I have the hardest time throwing away scraps - but those small pieces of paper have a tendency to get out of control.  Cards are the perfect way to use them.
  4. Sending a homemade card is a great way to share my love of papercrafting with all those people in my life who just don't get it.  (We all have those people right?)
  5. I can make a really pretty card with lots of layers very quickly (as compared to making a layout).  This is a great way to squeeze in some scrapping time in a really busy week.
  6. I actually use my stamps.
So did you participate in world card making day?  What did you make?

Friday, October 2, 2015

Inspired by the Paper

I am seriously addicted to patterned paper.  I buy it, I hoard it and I'm inspired by it. I often start with a piece of beautiful patterned paper as the base for a color scheme when I start a layout.  And when I open a kit, the paper is the first thing I look at.

This sheet of paper from the October Afternoon Summertime collection jumped out at me when I unpacked my September Citrus Twist kits. 


I loved the colors and bold pattern.  But I thought it was going to be super hard to use. 

When I looked more closely I really focused on the lines in the pattern.  Taking a leap of faith, I cut a large triangular piece using those lines and placed it along one side of my base paper.  I cut a smaller piece to place on the opposite side.   And then decided to place my photo right in the center.


I added some scraps of black paper to help add definition and built up my photo block with coordinating papers.  I added some die cuts and a title with great vellum alphas from the last ever Pinkfresh Studio embellishment kit and my layout was done - I thought.

But I had never cut that grey polka dot branding strip off the bottom of the base paper.  I really liked the way it looked so I ended up trimming the other end of the paper so I could keep those polka dots.  (Another make it work moment :) )

Then I was done...... and ready to pick some papers for my next project (it is the best part of scrapping)

Thanks for stopping by.

Thursday, October 1, 2015

Switching Kits

Currently I am subscribing to kits from Studio Calico and Citrus Twist kits (while I try to decide what to do about my SC sub.  Last month I mixed the kits together as a way to use them both.  But I actually ended up feeling overwhelmed by the choices and realized it wasn't a good way to evaluate the kits that worked for me.  So this month I used SC for two week and now I'm breaking out the September Citrus Twist kits. 

The papers in the Citrus Twist kits are beautiful so I went for lots of layers on my first kit - that way I got to use lots of pretty paper.  I did add a piece of woodgrain paper to serve as the base and a couple craps to the layout. 


My favorite part of the box this month was all the die cuts!  We got a partial pack of those fun triangles from Pinkfresh Studio, a package from Crate Paper Wonder, and a package from WRMK Wildflower.  And I had a package from Pink Paislee Cedar Lane in my box.  So I dumped them all into containers in the top of my Raskog to use with the kits.  I love the Pinkfresh Studio wood veneer and little cork arrows too.  I think I managed to use all my favorites on this layout

I can't wait to make something else with this kit.  Thanks for stopping by.

Tuesday, September 29, 2015

Brimfield Is My Favorite

It's no secret - I haven't loved the Studio Calico kits lately.  Far Far Away (back in January I think) was really pretty though there were pieces I struggled with and I really enjoyed Lisse Street (maybe March or April), but the rest of the kits have been challenging for me to use or just totally not my thing.  But Brimfield is a home run!  (Yes I still think the kit should have some more stuff for the price, but it was beautiful and fun to use.) The papers are gorgeous - beautiful color and patterns that are classic and versatile.  It felt like the kits that inspired me to become a subscriber three years ago.


Which made me think - what really makes me love a kit - it's not the stamp (in fact I sold the stamp in this kit.)  I think it is versatility - I made five layouts with the goodies in my September box before I broke it up into my stash.  And I when I look at them they all look unique.

Four of the layouts were in prior blog posts - one is soft and romantic, one features a train and has a little bit of a vintage feel, one is super bright and fun, and the fourth one features soft colors and feels classic.  And the fifth one (at least to me) captures a sense of contentment, mixing bright colors with pastels.

inspired by sketch at Citrus Twist kits
So I'm putting away Brimfield after five layouts - but it was a good one!  (That star transparency is going to end up in a December Daily) In fact if it goes on sale down the road, I will be trying to nab another one.

Thanks for stopping by.

Monday, September 28, 2015

I Do It For Me

Sometimes I think all my layouts start to look the same - I like patterned paper backgrounds, lots of colors and patterns and bits, layers and grids.   Some or all of those elements are in all of my projects.  So then I think I need to do something different - but I don't even know what that is.  And I end up with no layout or a layout that I don't like - I think because I tried too hard. 

This summer I have really struggled with inspiration and motivation.  I've spent a lot of time thinking about why and trying to get back on track  -- which leads me to why I scrap.  Sure the memorykeeping and story telling is great, but that's not why I scrap.  And I love it when people like my projects and I get compliments and recognition in online communities.  But mostly I scrap because the act of doing it makes me happy.

So not all my projects have to be works of art.  I would love to be on a design team someday, but every layout is not an audition.  I will get that opportunity when and if its meant to happen.  And the truth is my favorite layouts (and probably my best ones) are the ones that make me happy while I am creating.  So its ok if I stick with mixing colors and patterns, grids and layers -- in fact its perfect since I will find the joy in creating again.  And if they all look alike, that's just the way it is.  I guess you would call it "my style."

So here you go - a layout with a patterned paper background, lots of layers, little bits and pieces and it's a variation of a grid design.  And I love it.  I smiled while I made it and I smile when I look at it.  (Who knew I would end up loving those transparent bird die cuts?)

Design inspired by sketch at Studio Calico

Thanks for listening to me ramble on.  I'm off to play with paper.


Sunday, September 27, 2015

Make It Work

This is the first layout  I made with Brimfield and I think it might be my favorite.  The colors and patterns in the papers are timeless.  Those chipboard phrase strips are one of my all time favorite things.  And I love how the products in the SevenPaper baby collection (Clara) coordinate perfectly.  The die cuts and the vellum stars came from those extras that I added to my September box.


But we had a "make it work" moment.  I needed a tag that coordinated to fill in that top block of my grid.  Despite my collection of shipping tags, nothing was quite right.  So I went to those Clara die cuts to see if something would work.  There was a cute onesy with a gold star but it just wasn't right for this super girly picture.  So I turned it upside down, trimmed off the neckline and the sleeves and punched a whole in the center of the crotch.  Add some baker's twine and there it was - a super pretty tag that was perfect for my layout.

I'd love to hear about your "make it work" moments (I feel just like Tim Gunn).  Thanks for stopping buy.

Saturday, September 26, 2015

Layered Labels

I have always loved labels.  They are pretty, fun and versatile.  But they don't always work for journaling.  Sometimes I have too much to say and sometimes I don't have much of anything to say.  So I either end up with tiny little writing crammed onto a layer so that you can hardly read it or awkward blank space where it looks like I forgot to write something.  And so my label stash grows and grows and .......you get the picture.

But layered labels are my new favorite thing.  I pull several labels in different shapes and sizes and stack 'em up.  Maybe I add a few stickers, enamel dots or other small embellishments. Foam squares and glue dots can add extra dimension.   Or those phrase stickers that are all the rage - they are perfect for this.  Then I end up with a dimensional embellishment using up some of my favorite things in my stash.  And I can customize it to fit both the story I'm telling and the space I have to fill.


A little washi can anchor your cluster and add extra dimesion and texture too.

design inspired by sketch at Citrus Twist kits
 So you probably knew all about layered labels.  It is such a great way to build a custom embellishment.  But just in case you didn't...........

Thanks for stopping by

Wednesday, September 16, 2015

Finding My Way Back

I haven't been creating much but I think I'm finding my way back - Yay!  The September kits from Studio Calico are beautiful and I have made three layouts so far with them.  I especially like that I have made some soft and pretty things and some bright, fun things. 

This layout was inspired the sketch at Stuck!  They posted a new sketch this week.  Since it featured lots of layers, it gave me a chance to use lots of the pretty papers in the Brimfield kits.


And here is my take on the layout


I tried using my cuttlebug and dies out of vellum for the circular elements.  I know I'm probably the last one to this party but I love the effect.  (The die is from a Pinkfresh Studio embellishment kit.)


I have some more Brimfield layouts to share so keep an eye out.  Thanks for stopping by.

Sunday, August 30, 2015

Quick and Easy

I've been complaining for a while now about missing mojo.  It's not back yet, but I think its getting close.  This week I experimented with simple grid designs.  I often find them the easiest to put together.  I shared my favorite yesterday, but here are a couple more quick layouts that came together in the past week.

Products from Studio Calico and Citrus Twist Kits

This one was inspired by a Friday night challenge on the Paper Issues facebook page.  I had to feature patterned paper, die cuts, flair and enamel dots.  (You could use other products too.)  My favorite thing about this grid was the way I let little bits hang off the edges so that it wasn't perfectly rectangular.  I also like the combination of bright colors and a black and white photo.

Products from Studio Calico, Citrus Twist Kits and Pinkfresh Studios.

Here's the second one.   I started with the two long strips on the side and grew my grid from there.  The colors really are my favorite thing.  And that pink square with the large gold circle - its a piece of the scratch off paper in the Studio Calico Pop Art kits - I love the look without scratching the dot.

Tomorrow is a me day - I took the day off as a birthday present to myself.  I'm hoping to spend some concentrated hours in my scrap room in search of that elusive mojo.  I have a feeling I will be scrapping like crazy when it makes an appearance. 

Thanks for stopping by.

Saturday, August 29, 2015

3 To Inspire

Every Saturday Citrus Twist Twist Kits posts a "3 To Inspire" challenge.  The DT member leading the challenge gives you three prompts that you use together to create a single layout. Last Saturday the prompts were:

1. Create with at least 5 squares. 

2. Use medium (mist, ink, gesso).

3. Layered stickers.
 
So here is what I came up with
 
 
Use 5 squares - I used 4 squares of patterned paper, a square photo and a large square of plain vellum.
 
Use a medium - This was a bit out of my comfort zone.  I used gesso with a mask on that square of plain vellum to create texture behind my photo.  I absolutely loved how this turned out and will repeat the process on other projects.  I also used the gesso and mask to add interest on both sides of the page with the gold crosses.  I also added blue, green and gold ink spatters.
 
Layered stickers - I layered stickers from the Crate Paper Journey collection to create the bottom element in my grid design.  
 
This is one of my favorite layouts in a long time.  I can't wait to see today's challenge.
 
Thanks for stopping by.

Sunday, August 16, 2015

Mxing kits

I've been a subscriber at Studio Calico for more than three years.  And every month when my box comes, I rush to unpack it into the top of my raskog.  The supplies in the top of my raskog are the first thing I look at when I start a layout. 

Then a few months ago I added a subscription to the Citrus Twist kit.  It came around the middle of the month.  And it worked great - my Studio Calico kit would come at the beginning of the month and my Citrus Twist kit came mid-month.  So I would trade out the supplies in my Raskog when the new kit came.

Then Studio Calico changed their schedule.  Now the kits come much more closely together.  For the first couple of months, I just set aside one kit and continued switching out supplies after a couple of weeks.  But when I looked at a photo I would find myself thinking about items from the kit that was still packed up.   And because the Studio Calico kit has reduced the number of scrapbiij add-ons and the mix of embellishments seems sparser, I often felt that I didn't have enough choice.   So this month I unpacked both kits into the top of my raskog - and they work together great!

The Pop Art Kit (and relatd goodies) from Studio Calico came first.  This kit is full of super vibrant colors (the B sides of the paper are even brighter) - that yellow floral paper is a new favorite - I love the purple accents!  And the rubber ferns are so unique and fun.

The Citrus Twist box came next.It was full of bright colors and fun embellishments too.  I was so excited to get some Pinkfresh Studio papers and embellishments.  And I am always a sucker for a puffy alphabet from Evalicous.  And the two kits (and all the add-ons and extra paper worked together great!)


So last night I got to work - and I love the layout I came up with - in fact it might be one of my all time favorites.

The Pinkfresh paper and the Sevenpaper chipboard alphas came from my Citrus Twist goodies.  But the puffy diamond, puffy crosses, small alpha,  label and enamel dots came from my Studio Calico supplies.  (The amazing transparent triangles are from Pinkfresh Happy Things  and were in my stash.)


My favorite thing about this layout - that giant alpha.  When I first saw it I wasn't sure how to use it.  The letters are super wide and the scale is huge.  But they were really fun to play with.  They created a great element for my layout with a chance to mix in different embellishments.  And I love the look of the raw chipboard.

So do you keep your kits separate?  I'd love any ideas for using my kits more effectively.

Thanks for stopping by.


Sunday, August 2, 2015

Winner!

Life is crazy here right now.  We visited my hometown, I got sick and then my son came home from college - with all the laundry!  But I wanted to pop in to announce the winner for the challenge I posted a couple of weeks ago.  Drumroll please....


And the winner is

Here is my take on the challenge! I never scrap pictures of nature alone. Thanks for the inspiration. I hope that I didn't post this twice...

http://www.studiocalico.com/galleries/170120-just-look-up


Nicole please send me an email at juliee181 at gmail dot com and let me know which gift card you want.

I loved looking at the layouts that were linked so watch for another challenge soon.  In the meantime I'm posting the August LOAW challenges at Studio Calico if you need some inspiration.

Thanks for stopping by.


Thursday, July 30, 2015

Do Over

There aren't too many times when we really get do overs but scrapbooking is one of those places where it is totally possible.  I try not to do it too often but sometimes I just really don't like my end product.  This was one of those days.

Sunbursts are all the rage but I have a really hard time with them.  But when the sketch this week at Citrus Twist Kits featured a sunburst I thought I would give it a try. 


I thought about what I didn't like on past projects when I tried to use a sunburst and realized that they seemed to look heavy on my layouts.  So I decided to cut my sunburst from vellum


But I didn't like it and I'm not sure why.  My daughter thought it was because I needed more rays...

I set it aside but kept thinking about it and really didn't like it.  Then I remembered some vellum leaves in my stash (The advantage of a big purge is that you remember what you have.)So I lifted the photo block off the original layout and started over.


And I like it so much better!  And it took me about  minutes since I left the photo block intact.

Now I don't recommend frequent do-overs - after all there are so many photos waiting for love.  But once in a while it is definitely worth it!

So am I the only one who starts over?

Thanks for stopping by.....

Tuesday, July 28, 2015

Quick and Easy

I spent last Thursday - all day - cleaning up my craft room.  My daughter (who is only 15) could be a professional organizer. She helped me empty it out, sort through baskets, purge, and put it back together.  Late that night I had a clean space and was ready to play.  But after 1 quick layout, we went out of town. 

And when we came back I had to do something about the purge piles in the living room.  So it wasn't til last night that I had a chance to play again in my clean space.  I pulled together a quick layout using the newest sketch at Stuck!


I started with my July goodies from Citrus Twist (which currently hold the place of honor in the top of my Raskog).  I added a few scraps from my stash and couldn't resist the sevenpaper puffy hearts. 

Some gold ink splatters and I was done.  I'm hoping to play some more this week, but have a feeling my scrap time is limited until the weekend. 

Hope you are finding time to play.  Thanks for stopping by.

Friday, July 24, 2015

Mixing Textures

I think a lot about mixing colors and patterns on my layouts.  But I don't think about texture very often at all.  But the truth is that texture is just as important.  And my July box from Citrus Twist Kits provided the inspiration to use texture as a focus in choosing elements for my newest layout.

I started with a great piece of woodgrain paper.  The main kit included a fun piece of fabric that I would never have thought to use on a layout.  But it served as the perfect base for my photo block.  It added depth and interest that paper just wouldn't have brought to the table.

Design inspired by sketch at Citrus Twist kits
The embellishment kit included denim stickers which sounded a little strange but I love.  And they added another textural element.  Shiny gold chipboard contrasted with the fabrics and woodgrain for added interest.  And it just so happens that I had added some cork stickers to my box that worked perfectly with my project. Enamel dots, wood buttons, flair and acrylic shapes all added more texture and interest.  And of course I don't seem to be able to finish a layout without ink splatters.  But this time I used navy colorshine instead of gold, white or black.

Hope you have a great weekend.  We are headed to my hometown.

Thanks for stopping by.

Monday, July 20, 2015

Kit Review: Paper Camellia

Prior Reviews
 
Happy Monday!  We had a crazy weekend with some unexpected tasks, so I'm a little bit late today.  But  I wanted to share the next installment in my kit review series.  This week I played with the April kit from Paper Camellia.
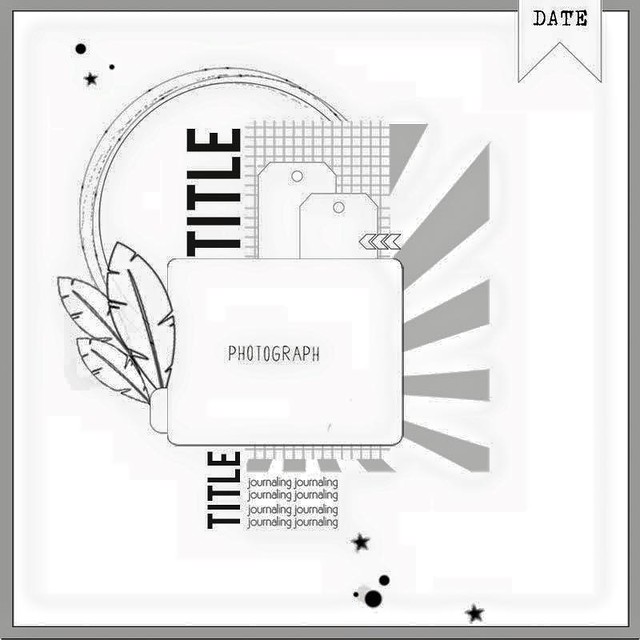

I wasn't familiar with this kit club at all so I didn't know what to expect when I ordered a kit.  But it was packed with a mix of Maggie Holmes, Crate Paper and My Minds Eye.  The soft color palette was perfect for a photo of the bowl of Lake Erie beach glass and pebbles I keep on my desk at work.  

The kit included a 3 sheets of cardstock, 5sheets of patterned paper and a ton of embellishments.  I  tend to love any kit that comes with a full package of die cuts and that Maggie Holmes confetti pack was on my wish list.  The kit did not include a stamp.  

My only complaint about the kit would be the lack of a larger scale alpha.  It had several small My Mind's Eye alphas (the mixed color alpha you see in the photo and several tile style alphas), but I love thickers and alphas of a similar scale. And the Maggie Homes thicker pack provided lots of choices for putting together a title to a layout.

I was really inspired by a layout by the wonderful Danielle de Kronik which just happed to be the Sunday Scraplift challenge at Paper Issues this week.  So here is my finished product.


I especially loved all the gold accents in this kit.  They provided lots of textures that helped keep the soft color palette interesting.  (The enamel dots and hearts were from my stash.)

Paper Camellia kits are $29.95 for subscribers.  Shipping in the United States is $8. The website says you can cancel at any time.  But if you cancel after the 20th, you will receive the next month's kit.  It seems like a super manageable commitment and the kit was a great value.  I've been checking out their website and the past kits all look really lovely.  They offer a variety of add-ons each month too and have a project life style kit as well.  This is definitely on my list of kit clubs to keep an eye on.  

I still have kits from Studio Calico and Scraptastic sitting in my scrap room and a Cocoa Daisy kit is on its way.  I am still thinking about trying to snag kits from Clique Kits and Gossamer Blue to add also.  Let me know if there is another kit that you think I should check out.

Enjoy your evening.  Thanks for stopping by.