Pages

Showing posts with label lisse street. Show all posts

Tuesday, May 5, 2015

Patterned Paper

One of my favorite things about scrapbooking is all the pretty patterned paper.  And I love mixing patterns and colors to create unique looks.  In fact, I often pick a paper combination and then go look for a photo that works with those papers.


And birthday layouts provide a great opportunity to go all out.  A mix of papers can really create a fun, celebratory feel on a page. This layout mixes 8 patterned papers and 1 patterned vellum.  The end result is bright and fun.


Here are some things that help me mix papers:


  • Use a patterned paper with lots of colors as your inspiration for the papers you choose.  (I started with that great striped paper.)
  • Mix patterns - all stripes are hard.  But stripes and dots - really cool!
  • Make sure your patterns are in different scales - it creates balance
  • Don't forget to think about a patterned background - the tiny stripes here add a lot of interest without distracting from the photo.
  • Lots of different patterns may mean fewer embellishments or more neutral embellishments.
And most importantly, don't be afraid of changing your mind.  If you cut a piece of paper and it doesn't work, just put it in your scrap pile.  It's only paper and sometimes a little experimentation will create a beautiful, unexpected mix of papers.

Hook me up with your patterned paper projects.

Thanks for stopping by.

Friday, April 24, 2015

Christmas - but not Christmas product

When I first started scrapping back in the dark ages, I was obsessed with Christmas themed supplies.  And I still have a huge holiday themed stash.  But lately, my holiday layouts seem to be built with little or now themed products.  Instead I seem to gravitate toward classic patterns and colors when I am working with holiday photos.

This layout was inspired by last week's project life sketch at Studio Calico. 


And this layout goes back to one of my go to designs - a basic grid.  But I trimmed a piece of pale blue ledger paper and turned it on the side for the base.  Then I let the columns and rows on the ledger paper shape the grid.  It was a fun technique that came together really quickly - I will definitely try it again.


And that jillibean soup flash card was perfect for my photo!

I'm curous - are you still using lots of themed supplies or have you moved in a different direction too? 

Thanks for stopping by.

Thursday, April 23, 2015

A Big Photo

I used to scrap 4x6 photos period.  Now my favorite photo size is either 4x4 or 3x3.  But I still like to mix it up.  So those 4x6 and 3x5 photos creep into my layouts.  And sometimes I order polaroid style prints from Persnickety Prints.  And I have a stack of larger photos on my desk.  So Sunday I pulled out a 6x12 photo.

The photo of my 14 year old daughter swinging and laughing is one of my favorites from last summer.  She is 15 now and I am afraid there won't be too many more pictures of swinging and playing and being a kid.  And because the photo caught the sense of motion - check out her hair - I ordered a large print because I didn't want to lose any of the details or the sense of joy. 


The layout is super simple.  I just layered patterned paper and vellum to one side ofthe photo to add interest.  On the other side I added a column of vellum hearts from Sevenpaper, going from large to small.  I need about a zillion packs of those hearts!

The title went right on the photo.  Those giant chipboard letters from Studio Calico's Lisse Street scrapbook kit were perfect for this.  (I could use a few zillion packs of those too).  I added the date and a phrase sticker to my paper layers near the bottom of the page.  A few glittery hears and a die cut mounted with foam squares and I was done. 

I am a ridiculously slow scrapper and I don't think this took me more than 45 minutes.  Of course, I was helped with inspiration from mem186 at Studio Calico.  She picked an awesome layout for me to lift that was the real starting point here. 

Thanks for stopping by.
Tuesday, April 21, 2015

Not Where I Was Headed

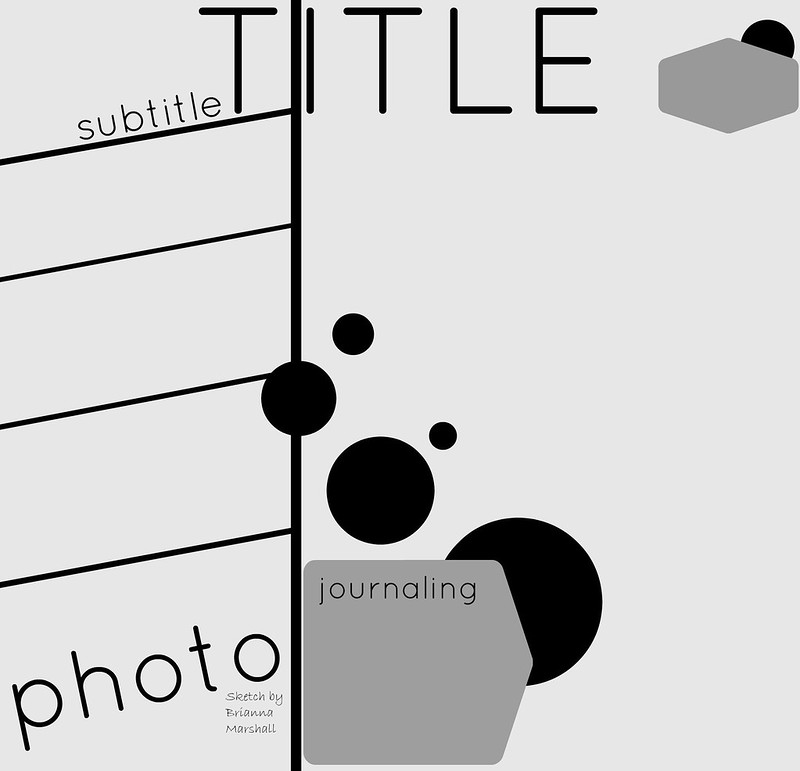
I'm having a lot of fun with the sketches from the My Scraps and More Sketch-a-thon this month.  And most of the time my layouts end up looking something like the sketch I started with - even if I turned it or changed the angle.  But once in a while, the sketch and my finished layout part company by the time I'm done. 

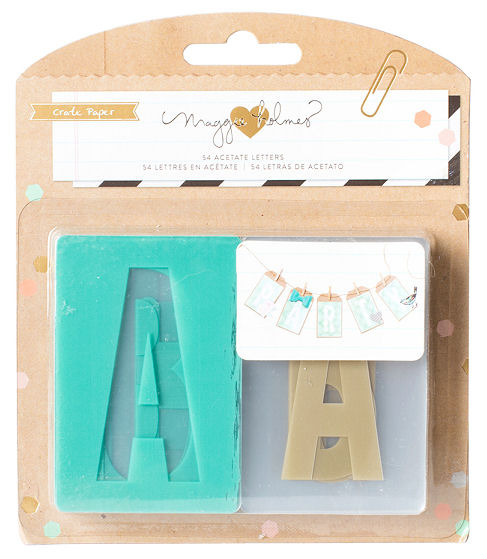
Saturday I started with this sketch.  It called for 3 photos.  I only had one, but I had a plan.  I was going to use one of those Maggie Holmes acetate letters and a piece of patterned paper for the the other two photos.   I think that's when I started to go my own way.


Then I looked at all the layers drawn under the two photos on the sketch.  Those became two strips of paper under my "substitute items."


The same kind of layers were drawn down by the other photo - suddenly those became four strips of patterned paper.  And that fun diagonal frame in the sketch - it became another square of patterned paper that connected the two components.  And now  that pretty sketch had turned into a grid style layout - still pretty, but very different from the sketch.

It just took a couple of things to finish off the layout.  I added small alphas right on top of the acetate alpha to create my title, added some ink splats (of course) using tinsel, seafoam and blush colorshine, a couple of bits from the new Pink Paislee collections, and some veneer butterflies from my stash. 

This is what I love about sketches.  They provide a great starting point and leave a lot of room to bring your own style to your finished project.

What would you make with this sketch.  If you give it a try, link me up.  I'd love to see.

Thanks for stopping by.

Monday, April 20, 2015

Spring

Each week Studio Calico posts a challenge from a member on their blog.  (I dream about being asked to do this).  The challenges are always fun, but last week's is one of my all time favorites.  It inspired a layout I would never have thought to make.

The challenge was to use a quote and leftover pictures and/or scraps of pictures.  And I have lots of pieces of pictures left from cropping.  I never want to throw them away but I have no idea why I am saving them. 

When I saw the challenge I immediately thought of photo scraps of a handbook spread I did last year with photos of spring flowers.  And of of my favorite project life card in the Lisse Street project life add-ons.  It had a quote about spring from Henry Wadsworth Longfellow

Came the spring with all its splendor,
all its birds and all its blossoms,
all its flowers and leaves and grasses

Maybe its because the winter was so rough, but the quote touched me as soon as I saw the card.

I arranged the photo scraps and the card in a simple grid.  Then I pulled out the Lisse Street 4x6 paper pad and cut small pieces to fill in the gaps.  I don't have a sewing machine but I love the look people get when they stitch and then bend up the papers, so I tried to replicate it.  I put a strip of adhesive down the middle and bent the edges up.

The project life card is attached to a vellum scrap and mounted with foam tape.  Then I added a few simple embellishments and some ink splatters to finish off the page.  

Use up those photo scraps and link me up with your projects.  I'd love to see.

Thanks for stopping by.

Saturday, April 18, 2015

Getting Started

I've really been going strong in my scrap room lately, but this past week I slowed way down.  I had a stack of sketches on my desk and lots of pictures, but I just couldn't seem to get started on anything.  Then last night I came across the latest Creative Jumpstart.

Creative Jumpstarts are challenges published (I think bi-weekly) by Marcy Penner and Stephanie Bryan - two of my favorite scrappers.  The challenges vary but this one was a recipe challenge - striped paper, chipboard and washi.

This was just the push I needed.  I had a picture of my cube-mate at work where she is looking between the glass panels that separate our workspaces that I had wanted to scrap and a fun striped paper from the Studio Calico Lisse Street kits that reminded me of her (I don't know why - it just .did).  And I had a sketch from My Scraps and More I really liked but had been struggling with


I thought it was perfect for my photo because the stripes reminded me of the way the cubes are lined up and the way we look for the glass panels.  But I finally figured out that the angle of the stripes was throwing me off.  I am a pretty lazy scrapper and its a lot of measuring and work to get those angles straight for a whole page.

So I turned the sketch 90 degrees, straightened out the stripes (sort of) and ended up with this.


Most of the papers I used were from the 4x6 paper pad - the smaller scale worked well for the size of the strips. 

I layered some of my paper strips for added interest.  And I used foam tape to adhere some of the strips and the photo - this created some dimension which I really liked. 

Next the washi - one of my favorites right now is a whide tape with navy hearts.  It was perfect, but I wanted a less perfect strip.  So I adhered one side of the tape to the paper and then tore down the middle for an uneven strip at the bottom of my page.  I finished it off with some chipboard thickers. 

If you try the creative jumpstart, the sketch or both, I'd love to see.  Link me up!

Thanks for stopping by.

Tuesday, April 14, 2015

Those Maggie Holmes Alphas

I am a confessed hoarder (though I am working on it) and I love my stash.  And alphas are one of my most favorite thing.  So When the new Maggie Holmes acetate alpha came with my Lisse kits, I feel in love.  And I couldn't wait to use it......
I only got the blue ones so I am going to have to order a set.......
I loved the scale - they are about 2 inches wide - and the distressed finish.  They are just so fun.  (Please note that I am a recovering hoarder - I loved them and wanted to use them :)  )

So I decided to use them as the starting point for a layout with a photo from Thanksgiving - our family has a Tripoley tradition and we often play for pennies when we get together.


I used my tiny attacher to create a title up the side of my page.  I loved that it totally filled the space.  I even had to trim the "P".  Then I pulled papers and other bits from my Lisse Street kits to create the simple grid.  That light blue card is a project life card I trimmed down and the sentiment on it is from another PL card.  And of course it took a few ink splatters to finish of the layout.

Thanks for stopping by. 

Monday, April 13, 2015

Stuck!

Lately my favorite starting point has been a good sketch.  And when I came across this sketch at Stuck! Sketches, I loved it.  So I printed it and put it in a pile of sketches I love that is accumulating on my desk.  (That way I don't have to spend time finding a sketch when I'm ready to scrap - they are just ready for me.)


I pulled some papers and embellishments from the Studio Calico Lisse Street kits as my starting point and went to work.  I even used my cuttlebug and a tag die to cut a project life card into a tag shape. 


I just kept adding layers til I was happy with it. I kept adding strips of paper and even ripped a piece of the sevenpaper gold triangle vellum when I was too impatient to hunt down my scissiors - But I like the look of the torn paper her.  Then I went to my stash - there are some "vintage" Dear Lizzy stickers on here that worked perfectly with the colors and feel of my layout.  I also added some wood buttons from freckled fawn that were sitting on my desk and some Crate Paper Crapft Market dimensional stickers with burlap to finish it off.  And of course I need some ink splatters - these are with Mister Huey's opaque white.

Thanks for looking.