Pages

Showing posts with label My Scraps and More. Show all posts

Wednesday, December 30, 2015

Christmas - Last Year

Is anyone really caught up and scrapping current photos because the old ones are all in albums?  I can't imagine - so when I had the urge to pull together a Christmas layout, I dug out a favorite photo from last year.

My husband has read The Night Before Christmas right before bed on Christmas Eve since our oldest son was 6 weeks old.  He uses the edition I had when I was growing up with Grandma Moses illustrations - this is one of my favorite holiday moments each year (and the reason this photo will show up in my December Daily, my family album and my daughter's album).  Last year only my daughter showed up to hear the story.

I didn't have much time, so I knew I wanted to use a sketch as my starting point - it makes everything faster.  I started with the current sketch at My Creative Sketches.


It had lots of layers so I knew it worked well with my style.  And I really liked the banner detail.  I used papers from a basket of small scraps on my desk - I'm not sure why but more and more I prefer using papers without a holiday theme on my layouts.


 I finished my layout off by layering some vellum banners from an older Pink Paislee collection.

The last detail was the title.  One of the Christmas caroling challenges at My Scraps and More asked that you use words from the Night Before Christmas poem as your title.  This was the perfect inspiration here and I chose "The Night Before." 

 Hope you had a great holiday.  I really enjoyed all of our celebrations, but have to admit that I am looking forward to the new year and having more time to scrap.  Thanks for stopping by - I will have more to share soon.

Sunday, December 27, 2015

Squeezing in Some Scrap Time

I love the holidays but there never seems to be enough time.  Still, I managed to make a few layouts this month and am hoping to share a few this week.  Since I only had a bit of time, I used a sketch to get me started.  This one from Stuck?! is awesome.


I turned the sketch on its side and put together a quick layout for a Christmas Caroling challenge at My Scraps and More.


The challenge was to use a large number on your page and the "2" from Pebbles was perfect for this title.  I had fun with my journaling too - I used my new typewriter (yay!) to create a conversation I thought my daughter and her dog might be having - way out of the box for me but lots of fun. 

Hope you squeezed in some crafty time during the holidays.  Thanks for stopping by.

Sunday, December 13, 2015

A Title Page

I like to start each of my kid's albums with a year that ties it to a year in school.  But I dread these pages - for whatever reason, they are almost always a struggle.  And my daughter's sophomore album is no exception.  I've been adding layouts but the first page is blank.

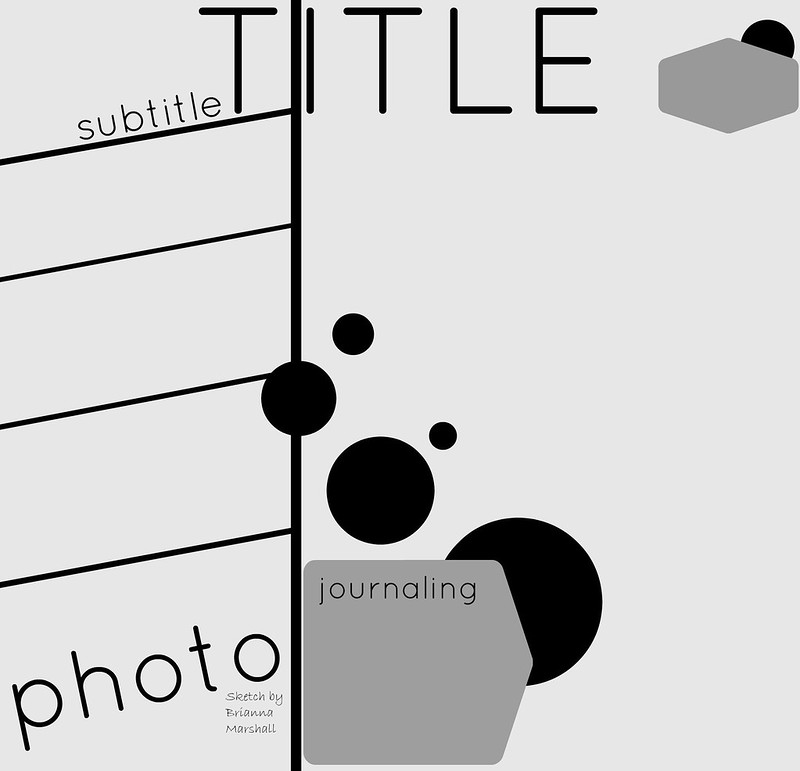
When I saw this month's sketch at My Creative Sketches, I decided to use it as inspiration for the layout I kept putting off - and I still put it off til the sketch link-up is almost closed. 


But I took the time for one tradtional layout last week and this was it.  I took lots of inspiration from the sketch and the opportunity to play along with one of the Christmas Carol challenges at My Scraps and More.  (These challenges are fun because they are inspired by Christmas carols but don't require holiday layouts.)  The O Christmas Tree Challenge was to use a tree, branch or leaves on your layout.

 I used bits from my Canyonlands kit from Studio Calico, my November kits from Citrus Twist kits, and other bits from my stash.  The end result was a fun page using one of her school photos. 


I think it is going to work perfectly as a title page.  And the sketch gave me a chance to use lots of bits from my stash - both old and new.

I am going to try to sneak in some more scrap time this week.  Hopefully I will have some layouts to share and some pages from my December Daily finished.  Hope you are having a great weekend.  Thanks for stopping by.

Saturday, April 25, 2015

Vellum!

I have lots of scrap related obsessions, but lately vellum has been on the top of the list.  I love that it has been included in collections in lots of colors, prints and textures lately.  And I have quite a stash.

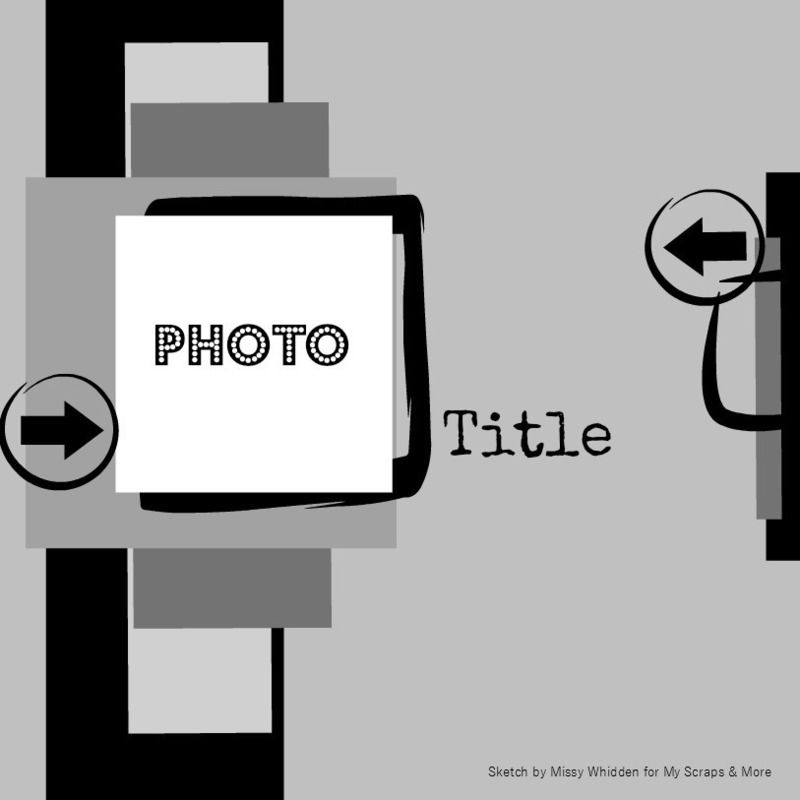
Most often I use it for layering in a photo block.  But when I saw the current sketch on the My Scraps and More Sketch Blog, I decided to try using vellum as the inspiration for my layout.  The sketch uses lots of strips of paper and I thought it would be fun to layer strips of vellum.


The layered vellum strips created a light girly look that i really like.  I mostly used strips from my scraps. And I added in a few strips of white and gray patterned paper to make the strips feel more substantial.   More vellum and a glassine bag to create a photo block finished off the layers across the page.


I dug out some old Basic Grey chipboard alphas for the title and added some embellishments.  And I just couldn't resist that floral stamp from the Studio Calico Lisse Street kit.  I lvoe that it looks like a doodle.

Thanks for stopping by.

Tuesday, April 21, 2015

Not Where I Was Headed

I'm having a lot of fun with the sketches from the My Scraps and More Sketch-a-thon this month.  And most of the time my layouts end up looking something like the sketch I started with - even if I turned it or changed the angle.  But once in a while, the sketch and my finished layout part company by the time I'm done. 

Saturday I started with this sketch.  It called for 3 photos.  I only had one, but I had a plan.  I was going to use one of those Maggie Holmes acetate letters and a piece of patterned paper for the the other two photos.   I think that's when I started to go my own way.


Then I looked at all the layers drawn under the two photos on the sketch.  Those became two strips of paper under my "substitute items."


The same kind of layers were drawn down by the other photo - suddenly those became four strips of patterned paper.  And that fun diagonal frame in the sketch - it became another square of patterned paper that connected the two components.  And now  that pretty sketch had turned into a grid style layout - still pretty, but very different from the sketch.

It just took a couple of things to finish off the layout.  I added small alphas right on top of the acetate alpha to create my title, added some ink splats (of course) using tinsel, seafoam and blush colorshine, a couple of bits from the new Pink Paislee collections, and some veneer butterflies from my stash. 

This is what I love about sketches.  They provide a great starting point and leave a lot of room to bring your own style to your finished project.

What would you make with this sketch.  If you give it a try, link me up.  I'd love to see.

Thanks for stopping by.

Saturday, April 18, 2015

Getting Started

I've really been going strong in my scrap room lately, but this past week I slowed way down.  I had a stack of sketches on my desk and lots of pictures, but I just couldn't seem to get started on anything.  Then last night I came across the latest Creative Jumpstart.

Creative Jumpstarts are challenges published (I think bi-weekly) by Marcy Penner and Stephanie Bryan - two of my favorite scrappers.  The challenges vary but this one was a recipe challenge - striped paper, chipboard and washi.

This was just the push I needed.  I had a picture of my cube-mate at work where she is looking between the glass panels that separate our workspaces that I had wanted to scrap and a fun striped paper from the Studio Calico Lisse Street kits that reminded me of her (I don't know why - it just .did).  And I had a sketch from My Scraps and More I really liked but had been struggling with


I thought it was perfect for my photo because the stripes reminded me of the way the cubes are lined up and the way we look for the glass panels.  But I finally figured out that the angle of the stripes was throwing me off.  I am a pretty lazy scrapper and its a lot of measuring and work to get those angles straight for a whole page.

So I turned the sketch 90 degrees, straightened out the stripes (sort of) and ended up with this.


Most of the papers I used were from the 4x6 paper pad - the smaller scale worked well for the size of the strips. 

I layered some of my paper strips for added interest.  And I used foam tape to adhere some of the strips and the photo - this created some dimension which I really liked. 

Next the washi - one of my favorites right now is a whide tape with navy hearts.  It was perfect, but I wanted a less perfect strip.  So I adhered one side of the tape to the paper and then tore down the middle for an uneven strip at the bottom of my page.  I finished it off with some chipboard thickers. 

If you try the creative jumpstart, the sketch or both, I'd love to see.  Link me up!

Thanks for stopping by.

Thursday, April 16, 2015

Colored Cardstock

I can remember when colored cardstock was a craftroom staple.  That must be why I have a really big basket of it - even though I almost never use it.  But once in a while, I dig out a piece for a project.

Saturday I was working with the May Studio Calico kits and really wanted to use the fun vellum in the main scrapbook kit.  It is printed with fun words in a great font - in white.  And when I put it over patterned paper, I felt like the detail was lost.  So I tried it over white paper - totally a waste of the pattern.  So finally I dug around in that basket of colored cardstock and pulled out a piece of soft aqua cardstock.

The vellum looked perfect"

Layout design inspired by sketch at My Scraps and More

I wanted a simple design so that the vellum would really shine. So I created a simple layered photo block.  The gold foil card is from the Studio Calico letterpress calendar offered at the beginning of the year (I snagged it at Last Call a while back) from a past month.  I cut it down so it worked in my design.

Of course I added ink splats, but some of them separated creating ugly blots on my cardstock.  I dug out some wood veneer flowers and used them to cover up the ink splats that didn't turn out so well.  And they turned out to be the perfect finishing touch.

Maybe this will motivate you to dig out that colored cardstock I know you have buried in your craft room.  Thanks for stopping by.

Note:  I just realized the date is wrong on my label - it was July 5, 2014.  I've fixed it now.

Sunday, April 12, 2015

30 Minute Layouts

I am great at collecting classes - but it seems like I never take the time to actually work through the lessons.  But last Saturday I had lots of time (my husband was sick and my daughter was doing the teenager thing and staying in her room), so I opened the class from Lilith Eckels at Big Picture Classes.  It was titled "30 Minute Layouts" and I am the slowest scrapper known to man most days so it seemed like a perfect fit.  Plus Lilith rocks - I always love her projects.  So I figured it was good for some eye candy if nothing else.

Have I mentioned that I am painfully slow when I scrapbook.  I obsess over the placement of every enamel dot, die cut and piece of veneer.  I can move one label around for hours trying to find the perfect place.  So imagine my surprise when I had worked through 2 lessons and had two completed layouts in about 3 hours.  This was record setting pace for me.

The first lesson was really about choosing supplies and organizing.  I watched the video and read through the narrative - and then whipped together a layout about work.

The second lesson is about pulling layouts together with leftovers from other projects.  I started with a stack of scraps by my trimmer and embellishments scattered across my desk.


I added the base paper, the veneer hearts, and the label.  Everthing else was sitting on my desk .  If I didn't use it, I would have to put it away.  I call this a win-win.  I played, ended up with a layout and have less to put away.    (Note:  Design inspired by sketchy saturday at PI)

Then I made a second layout with the scraps from the scraps - all I added was the base paper and the alphas.


So maybe I should take more of those classes I collect?  And for sure I am going to consider possibilities before I clean up. 

Thanks for stopping by.

Tuesday, April 7, 2015

Adding Texture and Dimension

I love pretty paper, but lets face it - it is flat.  So I am always trying to add dimension and texture to my layouts.  Those heavy textured papers are always favorites for just that reason.  But they seem to be harder and harder to find.  And since my LSS closed, I am having to guess at the texture of a sheet of paper based on online descriptions and knowledge about specific manufacturers.

As a result, I am looking more at my stash to find ways to use layers and embellishments to add dimension and texture to layouts.  When I worked with this sketch from MSAM, I really tried to focus on texture and dimension as a way to make the design my own.


I started with a patterned paper background.  The large polka dots were fairly bold for a background, but seemd to go with the feel of my page and added a lot of dimension before I did anything else. 

Textures - Crate Paper - Craft Market
Then I started building the layers.  I pulled the peach and the floral papers from the March Studio Calico kits.  Then I dug through my scraps and found a piece of navy corrugated paper (maybe Fancy Pants?) and added that.  I also used a glassine bag that was leftover kit packaging under my photo - those pabs are a great way to add dimension and texture without spending an extra dime!


I added die cuts from Pinkfresh Studios (Up In the Clouds) and Elle's Studio (Cierra) and a glittery piece of wood veneer that was in my stash.  I dug out those gold foil alphas from the Studio Calico Lemon Lush line for the title.   Some ink splatters (using teal, peach and primrose colorshine) finished it off.

The finished layout had lots of dimension without burying the picture. 

Thanks for stopping by.

Saturday, April 4, 2015

Starting With A Sketch

One of my favorite starting points is a sketch.  So when I heard My Scraps and More was having a sketchathon in April, I was thrilled.  I've been scrapping a lot, and its the perfect way to keep my momentum going.  I mean, 30 sketches in 30 days?
 
The first sketch was published on April 1; the challenge also required fussy cutting.


I hate fussy cutting so I almost skipped the challenge.  But I really liked the sketch.  And I had photos from hy husband's birthday last summer that were begging to be scrapped.  So I poked around in my scrap room for paper that would lend itself to simple fussy cutting.  I found a sheet printed with black frames that seemed perfect.


The title and chipboard phrase stickers are from the Maggie Holmes Confetti collection.  I used the colors in the numbers to drive my color selections.  And I went to work on the background with my current favorite technique - layering rub ons and ink splatters. I added some small puffy stars from Crate Paper's Journey line to add a bit of dimension.

I'd love to know your favorite starting points for layouts when your stuck.

Thanks for stopping by.


Saturday, November 15, 2014

Scraps!

No doubt about it - pretty patterned paper is one of my weaknesses.  I probably have more patterned paper, carefully sorted by color and pattern, than I can use in my lifetime.  And there is no question - I continue to fall in love with no collections and add more paper to my stash.

But I hoard my paper.  I hate throwing even small scraps away.  And those scraps go into hanging files, sorted by color and pattern.  I use them as layering pieces sometimes.  And if they are big enough pieces, I use them for cards.  Or I go there when I think a project needs just a splash of a certain color.

But last week one of the challenges during the pinspiration crop at My Scraps and More was to create a layout inspired by a picture of a rubik's cube.  And I challenged my self to use only scraps (other than the layout base).  And of course embellishments were fair game.

So I pulled scraps of 9 different papers - I chose different colors and patterns.  And then I cut 3 inch squares and arranged them in a simple grid pattern.  Once I liked the arrangement, the adhesive came out and I created the base for this layout.


I layered on 3 3x3 photos with a white border from Persnickety Prints and went to town with the embellishments.  The Heidi Swapp color magic die cuts worked really well because I could use my inks to get just the color I wanted.  I also added stickers, paper scraps, enamel dots and buttons.  And of course, a layout is almost never done til there are ink splatters.

 So use those scraps and link me up to your projects.  I could use some new ideas.

Giveaway alert:  Don't forget the blog rebirth giveaway.  There are only a couple more days to enter.

Have a great Saturday.  Thanks for stopping by.

Sunday, July 7, 2013

Black and White and Lots of Color

Lately I've been loving bright colors - especially the combination of bright colors and black and white photos. So when I was digging through my pile of photos and came across a black and white 5x7 of my children on Easter morning (a few years ago), I got right to work.  Here's what I pulled together.


I mixed papers and embellishments from lots of different manufacturer's and lines for this - most from my scrap pile.  The base and the red heart journaling card are from the new Simple Stories line, I {Heart} Summer.  The yellow paper is from the MME Collectable line and the white paper is from the MME Indie Chic line. The dark blue paper is from the Dear Lizzy Lucky Charm line, the floral mini bag is from one of the Websters Pages Allison Kreft lines. The red floral paper is from the BG Piccadilly collection and the ledger border strip is from the new BG Capture line.  And the big yellow die cut is from an Amy Tangerine collection.


I also incorporated some ink splatters, a technique that I'm not very comfortable with.  I mixed white and the neon Mister Hueys.   Then I added some tiny enamel dots to help them pop.


This Dear Lizzy die cut (I think from 5th and Frolic) as a perfect shape and dimension.  But it wasn't really bright enough to mix with the rest of the elements on the page.  I added more enamel dots to brighten it up.  Then I combined it with an Amy Tangerine diecut and a fabric heart from the American Craft products you can find at Target.

This was also a great layout to incorporate trims. (I have jars of trims and rarely use them any more, so when I came across a challenge at My Scraps and More to use at least three on a layout, I knew I wanted to give it a try.)  I used a piece of orange stripe twill ribbon as a border strip, tied a piece of yellow ribbon around the white patterned paper and added some aqua crocheted trim to the heart journaling card.  It didn't really make a dent in my stash but it was a good reminder to look at all those trims when a layout needs a little something.

Have  a super Sunday!

Sunday, June 16, 2013

Unstuck With Roundabout

I had free time on Sunday and was determined to scrap.  But I had no motivation or inspiration for anything creative.  I purged my paper stash for most of the day and even seeing all that pretty paper left me cold.  But I was determined - a free day is rare.

So I pulled out my Roundabout kits (they are all mixed up in an oversized ziplock bag) and looked at them.  Still nothing.  Then I pulled out my pile of photos to scrap.  And my stash swap pictures made me smile - finally a start.

Then I looked at my challenge/inspiration notebook.  There was a layering challenge in the Oklahoma benefit crop, a sketch at the My Scraps and More sketch blog, and a My Scraps and More Got Talent mini challenge - use 3 stamps.  Could I put them all together?  That seemed to be enough inspiration to get me going.

I used the sketch as a starting point for my basic layout design.  (Of course, my layouts never look like the sketches, but they still get me started.)


And each photo block had five layers, meeting the terms of the Oklahoma benefit crop layering challenge.


And I used two word stamps and two arrow stamps on my layout.  (I never use my stamps, so this was a major accomplishment.


And I liked the finished product - maybe not one of my all time favorites, but still, I liked it.  I'd love to know how you get unstuck - please leave a comment and let me know. 

Hope your Monday is simply marvelous!


Friday, June 7, 2013

The Impossible Challenge - No Patterned Paper

My Scraps and More started their summer challenge event on Friday - and the first challenge was tough.  Put together a layout with no patterned paper.  Since I love patterned paper and mixing patterns, I was totally stumped - until I got started.

I used gold lame and primrose colorshine on white cardstock to create the base for this layout.


Then I created a photo block by layering cardstock, vellum and handmade paper.  I added lots of vellum and transparent elements from Studio Calico, Basic Grey, Heidi Swapp and Glitz.


I used ribbon, twine, washi and wood veneer for more texture.


And I finished it with a cluster of vellum and transparent pennants, wood veneer, and of course,  sequins at the top of the page.


By the time I was done I didn't even miss the patterned paper.  This was a great creative exercise.  Give it a try - make a layout without patterned paper. 

Have a super Saturday!

Tuesday, May 28, 2013

Scraplift

I love scraplift challenges - I see so many layouts that are full of inspiration, and the push to put my own spin on some of those great layouts is awesome.  But I never think about lifting myself.  So on Monday I was surprised and excited to see this layout of mine posted as the scraplift challenge at My Scraps and More.


It just so happened that I was sitting at my desk with three sheets of patterned paper and three rolls of washi trying to get started on a layout when I saw the post.  I wanted to do something for this week's washi challenge at Chic Tags.  And I immediately had an idea for this two page layout about a special breakfast I cook for my son on days when he has a big challenge - a big game, a big test, college boards. 

Here's what I came up with.


This layout is so different from the first layout.  I replaced the sequin cluster at the top of the page with a larger embellishment cluster.


The cluster is a combination of Amy Tangerine paper, Crate Paper die cuts (The Pier), sequins, ink splatters, enamel dots, wood veneer and basic grey die cuts.  And because I converted the layout into a two page layout, I wanted to balance this cluster with a cluster on the second page of the project.  I used this horizontal cluster.

 
This cluster included transparencies from Glitz and Basic Grey, the same Amy Tangerine paper, sequins, wood veneer and enamel dots.  The vellum heart is "vintage" Amy Tangerine.  I will be finishing this off with some journaling about making these special breakfasts for my son.

This layout was lots of fun - and I learned an important lesson.  When I'm stuck, I don't always have to go online or look at the work of others.  Just looking at layouts I've done in the past can be enough to give me that push. 

Have a terrific Tuesday.

Monday, March 4, 2013

Easter


[image]

I am tired of dreary winter days and the news is predicting a snowstorm tomorrow and Wednesday.  So I decided to scrap something springy to lighten the mood.  I used sketch 3 at the My Scraps and More Sketch-a-thon as my starting point.  But it was a card sketch and I have to admit that the end product doesn't look a lot like the sketch.  But you can judge for yourself.  Here's the sketch.

And here's the layout I came up with.


You had to use punched images in your layout.  I have an old creative memories punch I used for the small butterflies.  I punched them from the October Afternoon pie chart patterned paper on the bottom of the layout, positioning the punch to get different colors on the wings.  The base paper is from Creative Memories and the orange paper is from KI Memories.  The embellishments are from Basic Grey, My Minds Eye, and Amy Tangerine.  The chipboard butterflies were in my stash.

The snow is supposed to start here during the day tomorrow so I'm hoping for a snow day on Wednesday.  Stay warm and have a great week

Sunday, March 3, 2013

Sketch-A-Thon


[image]

The My Scraps and More sketch-a-thon started Friday and runs for the entire month of March.  A sketch is being posted each day and you earn points through the month for a chance a the grand prize - items from the OA Cakewalk collection.  Here's the first sketch. 

This sketch is great and was perfect for an adaptation to a two page layout.  (Since I only have three months to finish Nicholas's high school albums, I am looking for inspiration for the two page layouts for those projects.)  The MSM challenge also asked that you use two different alphas on your project.

My layout is about joining a new soccer team after the high school season ended.  And I did use the sketch as a starting point for a two page layout.   Heres what I came up with:


My design is really simple and uses papers from Creative Memories and Fancy Pants.  The large stars are from Etsy and had been in my stash for almost a year.  The soccer balls are from Jolie and were in the value spot at Archivers.  I used two different sets of Thickers for my title and used pop dots to vary the height of the letter tiles.  The red stars are Jenni Bowlin and the white stars came from a Studio Calico kit.

I'm hoping to have more scrap time today.  Enjoy your Sunday!

Monday, January 21, 2013

One Little Word Title Page

A few weeks back I talked about trying to do One Little Word for the first time.  I chose "focus" as my word - focus on the positive and things you can impact and let go of things you cannot change.  But ultimately the class wasn't in my budget.  As a result, I've had a hard time getting started. 

But this weekend My Scraps and More had a One Little Word crop on their forum boards (the challenges are still open this week) and it gave me a little kick in the butt.  I put together my title page for my album/journal for one of the challenges.


My album is an old 8x8 ditto album my daughter has discarded and the size presents a challenge all its own.  I've never done anything that size before.  But I have to admit, I was pleased with how this came out.  It isn't quite like anything I've done before, but it still feels true to my style.

Here's a bit about the elements of my page:
  • The background is from the Bo Bunny double dot line - I love all the great colors the ledger paper comes in.  It is one of my go to products and I try to keep a range of colors in my stash at all times.
  • I broke out the Mister Huey's (in silver again) to create the large "My Life" element and the spatter effect.  I also used it to color a white paper doily.
  • I used a Fancy Pants stencil card with the Mr. Hueys and love the impact of those large words.  I then layered a vellum scrap over the top to soften the look.
  • The sequins and vellum arrow are from Studio Calico kits and have been hanging out in my stash as things I love but wasn't sure where to use.  Their sequins are the yummiest colors!
  • The small alphas and the flair are from Basic Grey.  The sparkly jewel is from a Websters Pages warehouse box.
  • The polaroid frame is from KI Memories (yuoget a whole 12x12 sheet of them to break apart - all with different words and patterns.
  • The last piece is a Dear Lizzy die cut.
Are you working on your OLW effort?  Any pointers/ideas to start really working on the issue would be much appreciated.  Enjoy your Monday.

Friday, January 18, 2013

What's On Your Desk?

I try to be a neat scrapper.  I clean up my workspace after every layout.  But lots of paper and bits seem to accumulate anyway.  And when I'm on a roll, I become way less diligent about cleaning up.  Then I just set things to the side to put away later. Last weekend was one of those weekends.  I was inspired by all the CHA layouts and just wanted to keep scrapping.  And a box of goodies came from My Scraps and More.

One of the challenges was to make a layout from things on your desk.  Here's what I did.


And here's what I found on my desk (don't look at the mess).

  1. The background paper was in the box from MSM and the neutral pattern was a great starting point.  The vellum was out because I'd ripped the corner when I pulled it out of the package earlier in the day.I didn't have any alphas out so I printed an oversize title on the vellum in a bright color.  (I will definitely be using that idea again!)
  2. The patterned paper was sitting in my scraps.
  3. The scrap of gold POW paper was sitting on my desk from my December Daily project - I wasn't sure where to put it so I had just left it out.
  4. I always have rolls of washi tape sitting around.
  5. The picture was sitting in a pile of pictures to be put away.
  6. I keep a basket of shipping tags on my desk.
  7. The binder clip had come in a Studio Calico ki and I had no idea how to use it so it was sitting in a bowl of misc,. pieces on my desk.
  8. The little die cut was from a package of Fact or Fiction flags that have never been put away.
  9. And, of course, my trusty tape runner is always on mydesk to put it all together.
Try putting a layout together from the things on your desk.  You never know what you'll end up with.  Have a great Friday!

Sunday, December 9, 2012

Everybody Loves A Parade


I love the holidays and can easily get consumed by them.  But in past years I quit making progress in my other albums and had a hard time getting started back up in Januray.  So this year I am making a concious choice to take time once in a while to do a page in a "regular album." 

One of my current projects in Elisabeth's 5th grade album.  One of the first things I wanted to capture was the Labor Day parade.  This week's sketch at the My Scraps and More Sketch Blog provided a great starting point.  I added lots of bright colors and a little sparkle to capture that fun spirit.


Here's what I ended up with.  It's bright and fun (and two pages).


Both the yellow paper and the chevron paper are from Crate Paper.  Thye other patterned paper is from Cosmo Cricket.  Then you can find some October Afternoon, some Jillibean Soup (those journaling cards have been in my stash forever), some Elle's Studio, some Studio Calico, Some American Crafts, some Paper Play Studio and some Basic Grey.  and I did some different things (for me) on this layout.

  • I used some of those brads I accumulate but never use.  These wer from the October Afternoon Midway collection.
  • I used sparkly thickers.
  • I spread my journaling across the layout.  You can find it in three places.
  • I added the picture mounted in pink with pop dots so it became a focal point.
Are you working on anything besides Christmas projects?  Let me know and enjoy your Sunday.