Pages

Showing posts with label Elles Studio. Show all posts

Monday, October 26, 2015

A Photo On Vellum

I almost always order my prints - for the past 18 months or so it's been from Persnickety Prints.  But I've been wanting to experiment with printing photos on vellum (I think it might be a great technique to incorporate into a December Daily.)  So when we went apple picking, I decided to give it a try.  (I have a fairly basic inkjet printer.) 

I picked a photo of two apples and gave it a go.  The ink was visibly wet when it came out of the printer so I set it aside to dry for about an hour.  The end result was definitely worth waiting for - it have a beautiful soft feel that I wouldn't have achieved on cardstock.

products from October Citrus Twist kits.

I did run into a problem when I started to build my layout.  If you visit very often, you know that I like to layer lots of patterned papers.  And I found the patterns showing through my photo and changing the look of the image.  (In some instances I think this would be a great effect, but not what I was going for here.)

 I tried placing it on white card stock, but I lost a lot of the translucent feel the vellum brought to the table.  So I ended up layering a second piece of plain vellum under the photo and that worked perfectly.  And you can see where I used my tiny attacher to add the photo to my layout.  (I didn't want the adhesive to mar the image.)

I definitely will play with this technique again - it is so much fun and creates a unique look for the photo.  If you have any tricks you use to print photos on vellum, I'd love to hear them.

Thanks for stopping by.

Tuesday, October 6, 2015

Scraplift Sunday

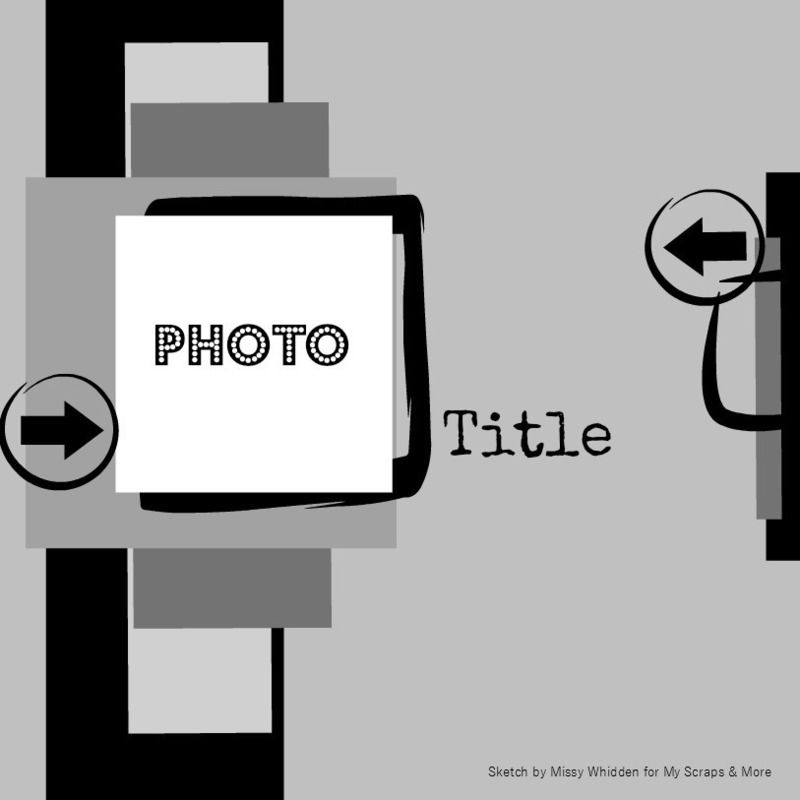
Paper Issues posts a scraplift challenge every Sunday.  And last week's layout included my two favorite things - layers and a grid.  So you know I was in. 

This is the inspiration layout by Heather Joyce.  It is totally amazing  with all those bits and pieces.  


My version is simpler - I focused on a large layered photo block with a grid underneath. 

I started with my September Citrus Twist goodies and added from my stash.

I used my new favorite trick and trimmed from the top of the page so I kept the detail in the branding strip.  And I have to tell you - those arrows from Pink Paislee might be my new favorite thing. 

Thanks for stopping by.

Monday, July 13, 2015

Kit Review: Scrapbook Circle

Prior Reviews

It's another Monday and time for another kit review.  I have been lucky enough to win both the May and July kits from Scrapbook Circle.  My plan was to work with the May kit this week, but when the July kit showed up on my doorstep, plans changed.  So I played with the July kit from Scrapbook Circle.


The kit had a great color palette that would lend itself to both bright and soft layouts.  Papers came from Crate Paper, Shimelle, Dear Lizzy and Pink Paislee.  The mix of embellishments was great too - The puffy stickers from SevenPaper are one of my recent favorites.  And I loved the Elle's Studio wood veneer pack.  (It made me wonder why I don't have more Elle's Studio in my stash.)  And the exclusive cork pieces were really fun.  The kit also came with an exclusive stencil which might help push me into experimenting with some of those mixed media supplies I've accumulated.

However, the only alphabet was the small tile style alpha from Shimelle.  I missed having a large scale alpha in the kit (although I have the world's largest collection of thickers and really don't need any more so that is really silly).  The kit does not include a stamp (important if you are a stamper)and does not include any cardstock - which doesn't bother me because I rarely use it.

These kits are not offered on a subscription basis - an interesting twist in a time when so many companies are focusing on securing commitments.  That's definitely an advantage in my book.  And they offer add-ons (including more pp and cardstock), cut files  and printables that coordinate with the kits.

My intention was to put together a layout that used some of the bright colors in this kit.  But I ended up with this layout emphasizing soft, pretty colors about my daughter helping me fix Thanksgiving dinner (2 and a half years ago - I might be a bit behind).

Design inspired by July 4th scraplift challenge at My Scraps and More
I added the doily, sequins and small pink alpha to the kit products for my layout. The label with the gold border made me really happy and I think I used almost an entire pack of the Elle's Studio wood veneers.  

The kit was lots of fun (the May kit is really pretty too) and I love that you don't have to make a commitment - I will be checking their website every month to see the kits and I am sure that some of them will be showing up on my doorstep in the future.  

Thanks for stopping by. 

Tuesday, April 7, 2015

Adding Texture and Dimension

I love pretty paper, but lets face it - it is flat.  So I am always trying to add dimension and texture to my layouts.  Those heavy textured papers are always favorites for just that reason.  But they seem to be harder and harder to find.  And since my LSS closed, I am having to guess at the texture of a sheet of paper based on online descriptions and knowledge about specific manufacturers.

As a result, I am looking more at my stash to find ways to use layers and embellishments to add dimension and texture to layouts.  When I worked with this sketch from MSAM, I really tried to focus on texture and dimension as a way to make the design my own.


I started with a patterned paper background.  The large polka dots were fairly bold for a background, but seemd to go with the feel of my page and added a lot of dimension before I did anything else. 

Textures - Crate Paper - Craft Market
Then I started building the layers.  I pulled the peach and the floral papers from the March Studio Calico kits.  Then I dug through my scraps and found a piece of navy corrugated paper (maybe Fancy Pants?) and added that.  I also used a glassine bag that was leftover kit packaging under my photo - those pabs are a great way to add dimension and texture without spending an extra dime!


I added die cuts from Pinkfresh Studios (Up In the Clouds) and Elle's Studio (Cierra) and a glittery piece of wood veneer that was in my stash.  I dug out those gold foil alphas from the Studio Calico Lemon Lush line for the title.   Some ink splatters (using teal, peach and primrose colorshine) finished it off.

The finished layout had lots of dimension without burying the picture. 

Thanks for stopping by.

Friday, June 28, 2013

I'm Published!

I'm so excited!  For the first time ever, one of my layouts is published.  You can find it in the online magazine Life Paper Scrapbook on page 71.  Here's my layout.


I pulled this together using the June kits from Studio Calico.  Those kits included great twine and this was the first time I played with letting it just wander across the page.  I used little pieces of wood veneer, little stars, and brads (where I cut off the prongs) hold it in place.  It creates a really great look.
 

I loved these Heidi Swapp alphas and am still using them.  They create sch a unique look.  And the Elles Studio background paper was perfect!


Then it was just about adding little bits and pieces. This leaf was in my stash and was from freckled fawn.


Friday, May 17, 2013

Using Project Life Cards on Traditional Layouts

I was excited to start Project Life this year.  I wanted to like it.  I had a hard to get subscription to the Studio Calico kit.  I bought an album, page protectors and grid cards with my Christmas money.  I bought little calendars to document what happens each day. 

But sorry - I know its not fashionable - but I hated it.  We don't do interesting things everyday- with teenagers, kids in college and 3 jobs between parents we don't even see each other every day.  And figuring out PL cards in pocket pages didn't give me the creative outlet I use scrapbooking for.  So I quit.

But I love the Studio Calico Project Life Cards.  The colors, patterns, and text are so fun!  And I like Elle's Studio cards and find other patterned paper intended to be cut into cards that I really love.  So I started thinking - grid design layouts are some of my favorite.  They tend to come together easily for me, they provide lots of opportunities for layering and using bits and pieces and always seem to look unique.  And wouldn't project life cards make those grid layouts even faster?  They would cut out lots of cutting.

As an experiment, I picked a piece of background paper, a photo and picked a theme - the end of my son's senior year.  Then I got out my PL cards and went to work.  This grid layout came together in about an hour, is visually appealing and says exactly what I want to say.


Here are some tips that seemed to make the process work for me.

1) Pick a base sheet and a color scheme before you pull out your cards. 

2) Make sure you use 1 card that can hold journaling.  (This is a great way to push yourself to add journaling to your pages.

3)  Pull some possible embellishments and scraps for layering before you start.  Don't forget vellum - your best friend when adding layers.

4) Don't be afraid to overlap your cards, embellishments and pictures - it adds depth and lots of visual interest.

5) Plan for your title - it should be part of the grid design, not an afterthought.

So try playing with those PL cards - I'd love to see your projects where you used PL cards in unexpected ways.  Have a fantastic Friday!

Wednesday, March 6, 2013

Hook


Hook

Last weekend I posted my version of the Studio Calico March add-on named "Wendy."  Well, I had so much fun putting that kit together, that I couldn't resist trying again.  So this morning I pulled together my version of the "Hook" add-on.

It was just as much fun as putting together the last kit, and again, I liked my version just as much as the add-on that sold out in seconds at Studio Calico.

Here's the list of items included in the Studio Calico kit.

Embellishments:
Boy Crazy Enamel Dots (My Mind's Eye)
Bingo Chips Thickers (American Crafts)
Hey Boy Element Sticker (Basic Grey)
Hello Frame in Wood Veneer (Studio Calico)
Hey You Matchbook Alpha - Blue (Basic Grey)
Color Me Happy Woodgrain Washi Tape (Glitz)
Be Waiting 4x3 Stamp Set (Studio Calico + Hero Arts)
Patterned Paper:
Depression (Kesi Art)
Boy Crazy "Point The Way" Paper (My Mind's Eye)
Adventure (Echo Park)
Nollag (Kesi Art)
Marine Mini Dot (Crate)
Apricot Mini Dot (Pebbles)

Here's the kit I came up with --


And here's a list of the items I included:

Embellishments:
He Said/She Said Enamel Dots (Teresa Collins)(the Boy Crazy and Oliver Lost and Found sets worked well too)
Kraft Choose Happiness Tape (Glitz)
Wood Veneer Dots (from a trip to the woodworking store with my husband)
Wood Veneer Shipping Tag (The Container Store)
Turquoise Pennants (Elles Studio)
Flaky Woodgrain Thickers
Cream and Denim Mini Market Alpha (October Afternoon)
Stickers (Basic Grey/Knee Highs & Bow Ties)
Decorative Buttons (My Minds Eye/Collectable/Notable)
Flair (Paper Play Studio)
Patterned Paper: 
Heavenly Houndstooth Paper (MME/So Sophie/Pretty Girl - b side)
Tidewater (Studio Calico/Sundrifter)
Flynn (Studio Calico/Darling Dear)
Adventure (Echo Park/All About A Boy)
Star (Fancy Pants/Trendsetter)
Kick the Can (Basic Grey/Bow Ties)

I'd love to know what you think of my version.  Hope you're enjoying your Wednesday.


Saturday, January 12, 2013

Wish I Was There

The Winter Craft and Hobby Association show (CHA) starts today an i wish I was there.  I've been watching all the sneaks and can't believe the great lines coming out.  (I hope my lottery ticket wins!)

Since I can't be there, I thought I'd share some of my favorite sneaks with you - these are line I know will find their way into my stash.

DIY by Crate Paper - I think this is my absolute favorite - look at the transparencies and other great embellishments!
DIY_Embellisments 2

Snippets by Studio Calico - love the colors, patterns and wood veneer


331367_SC_Snippets_CollectionPack_PKG_F-01

 331341-WOOD VENEER-01

Daily Flash  by October Afternoon - they are just starting to show sneaks but I love this one - especially the die cuts and alphas.

_DF Sneak Peek v2-01

Composition and Color by Websters Pages - This is an Allison Kreft design and gorgeous.  I love the colors and patterns, those little bags and nini folders - and think I need it all.

 Allisonpresentation (2)


Hipster by Basic Grey - I love the colors, the acetate alpha and the wood veneer is amazing!


Day To Day by Elles Studio - the collection has great patterned paper, colors and design elements.


by Theresa Collins - inspired by memories of her mom - I love the colors and those enamel dots


Screen shot 2013-01-10 at 8.57.29 AM
Screen shot 2013-01-10 at 9.05.22 AM
 Screen shot 2013-01-10 at 9.07.15 AM

Collectable by My Minds Eye - I love the way MME brings out different themes within a collection; it provides so many opportunities to mix and match product and create your own look.  And they have lots of new enamel dots colors (which are one of my big weaknesses.)
 IMG_1461

 IMG_1431


 IMG_1409

 MME Collectable-Unforgettable

Since I'm not there, I'm just going to keep checking things out online and building my giant wish list.  And I think I'll play along with the CHA events at 2Peas and Studio Calico.  Are you paying attention to all the great new releases?  What are your favorites?