Pages

Sunday, January 31, 2016

January at Citrus Twist Kits

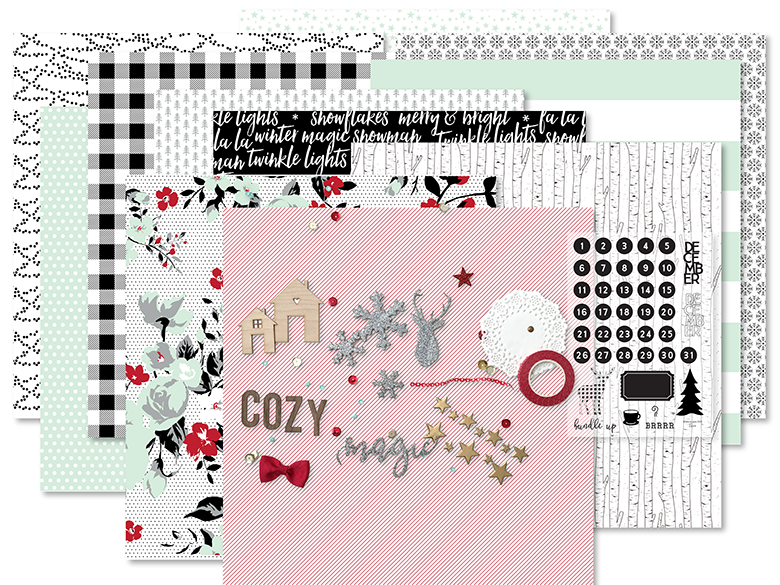
I finally seem to be about over the January crud (otherwise known as bronchitis) and am getting back to all things scrappy - YAY!  Last Friday I unpacked my January Citrus Twist kit box and boy was it pretty.  I had the scrapbook main, the add-on, both patterned paper add-ons and the sprinkles kit to play with (and a couple of shop extras).  In between naps, I cranked out three layouts I really loved.

The first one was based on a Citrus Twist sketch and gave me a chance to layer lots of the patterned papers I found in my box.  The papers are bright and fun and perfect for holding off the winter blues.


Here's the sketch I started with.....


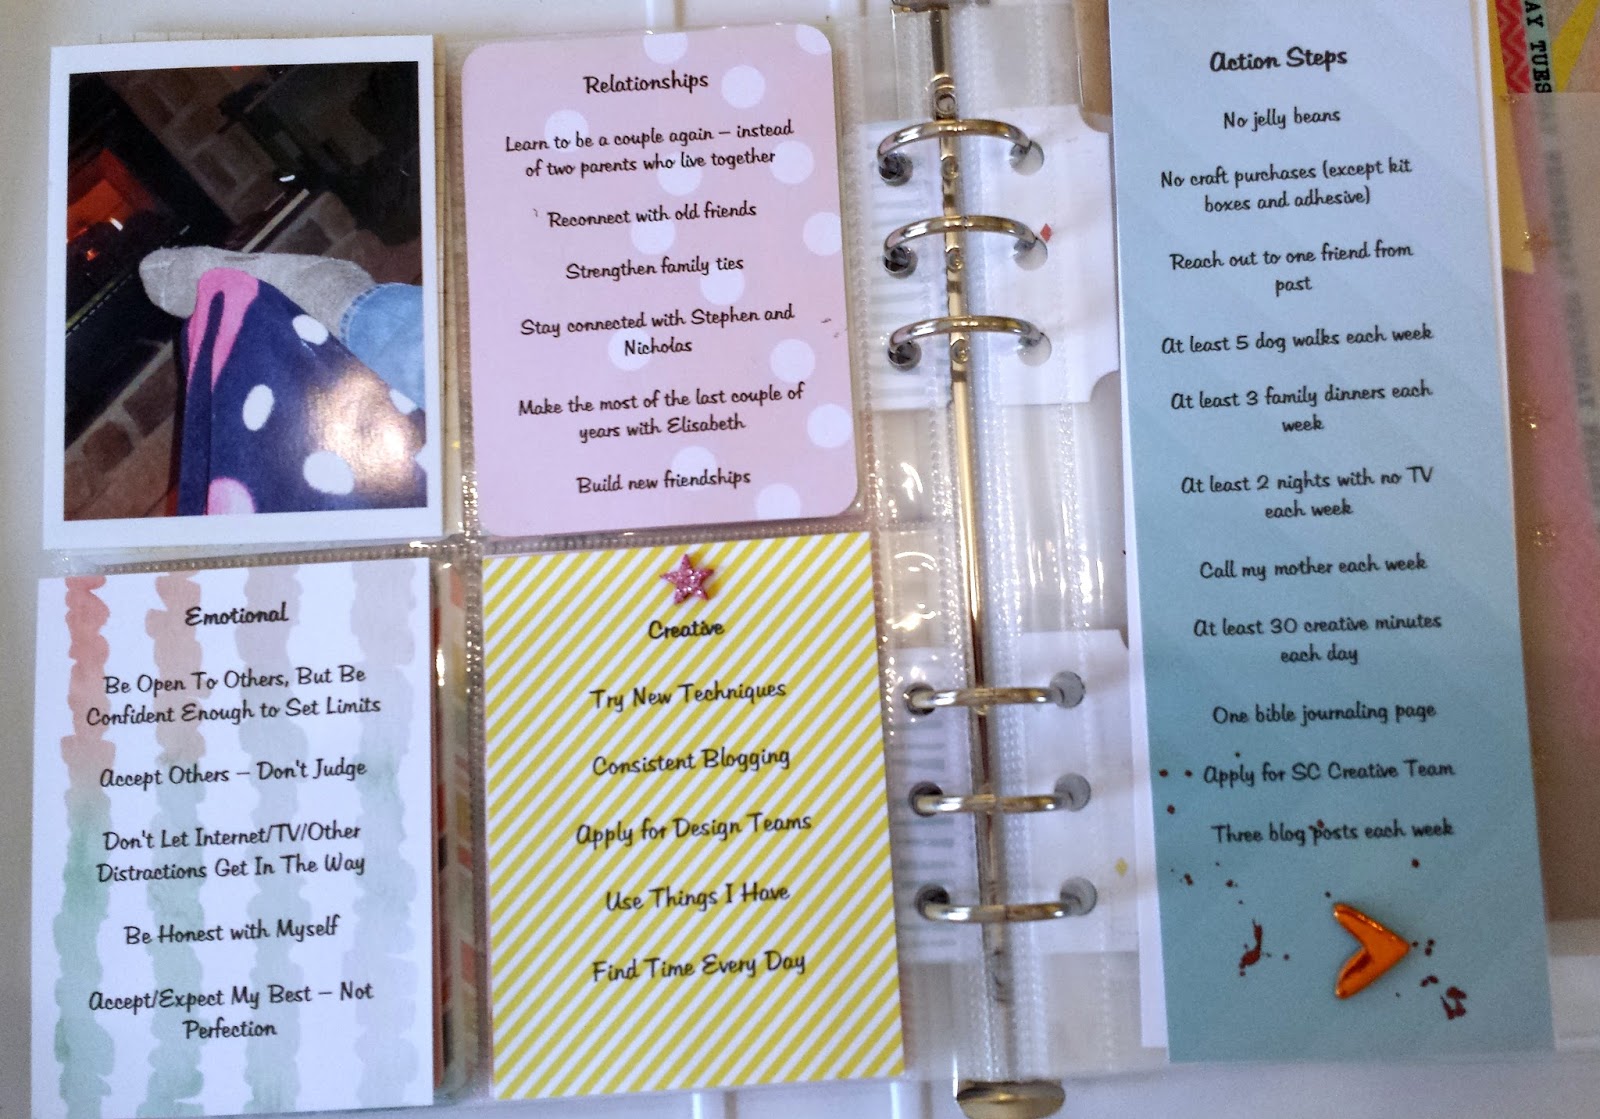
And here's the layout I ended up with.  I chose a photo of my son with out cat from his holiday visit for my layout.  He had a tough semester at school and was pretty down on himself when he got home.  But he and Taffy have long had a special bond and she spent lots of time cuddling with him - a definite mood lifter!  And since she is getting old, I wanted to take the opportunity to document their relationship.


I chose the bright yellow paper to serve as the main block in my layout and added other papers on top and behind it to capture the elements in the sketch and create some dimension.  But the photo block seemed to float awkwardly on the base paper (a Citrus Twist exclusive - I loved the grid with pink splats), so I added a branding strip from the bottom of one of the papers.  It really seemed to anchor the photo block and from their the layout came together quickly. 

The Heidi Swapp wood veneer word came that pretty aqua color and was perfect for my layuot.  A few die cuts, some puffy stickers and some ink splats and the layout was done.

I will be sharing at least 3 other layouts using these kits this week - I hope you'll come back and check them out.  In the meantime, have a great Sunday.

Friday, January 22, 2016

My Creative Sketches - January edition

My Creative Sketches posted a new sketch this week and its a good one.


When I use a sketch for inspiration, I often look at the elements and move them around to fit my photo and the products I have readily available.  This was one of those times.  Here is the layout I ended up with.


While the placement of the basic layers stayed pretty close to the sketch, the embellishments moved around a bit.  When you are moving elements in a sketch, the trick is to stay focused on the visual balance in the design.  For example, if you move an element from the bottom to the top of the layout, look for an element at the top of the sketch to shift to the bottom.  The same goes when you move an element from the left side of a project to the right side of the project.  Here are the shifts I made:

  • The sketch uses an embellishment cluster anchored by a tag at the bottom of the photo block - I moved that element to the top.
  • The embellishment cluster to the side of the photo moved to the other side on my project.  I was using that fun transparency phrase element as a layer and didn't want the embellishments to cover it up.
  • I used the garland sticker under the photo instead of the row of hearts at the top of the layout.
  • Those two hearts at the bottom of the photo block on the sketch - they moved to the other side and became arrows and stars.
Hope this makes sense - it provides a ton of flexibility and the changes mean you can use the same sketch for multiple projects (that all look really unique).

This is Friday - I am really excited to have made it to the weekend.  I am planning to do some organizing, some scrapping and lots of recovering over the next couple of days.  I hope you have some fun things planned.

Thanks for stopping by.

Thursday, January 21, 2016

Mixing My Kits with My Stash

One of the goals I set for myself this year is to use more of my stash.  I belong to two kit clubs so I get lots of pretty new things every month (even if I manage not to hit up the Paper Issues store for products I just can't resist).  And I'm a little bit like a child - the shiny new things in my craft room tend to capture most of my attention - and my stash keeps growing and might collect some dust.

So this year, after I make one (or a few layouts) with just my kits, I am going to trying to mix pieces from my stash in with the products in my kit.  I'm not sure I will accumulate less, but at least I will use some things that aren't brand new to my craft room. 

This layout (my current favorite project ever) is a great example of this strategy.  I started with the Arendal products from Studio Calico.  The layout base is a piece of white cardstock with the vellum (which is to die for) from the main scrapbook kit layered over the top.  It creates a soft neutral base for the project but still adds a lot of dimension and texture. 

My layout was inspired by the same sketch as my Merry layout - I used the diagonal lines to create different layers in my photo block - it was a fun way to add lots of patterned paper without overwhelming the photo. 


Here is a step by step of my process.

  • I started by building the layers that used diagonal pieces of papers.  The papers that came in the Arendal kits were my starting place, but  I pulled the mint piece from my stash when nothing seemed to work with the heart paper - it was perfect. 
  • Next I build the full photo block, attaching the photo to the smaller block I created by piecing two papers together.  I added some strips of patterned paper to the layers I constructed using triangles until I was happy with the general look of the photo block.  I felt like it really needed some green so I dug in my "small scrap basket" for that green stripe paper.
  • I attached the vellum to the cardstock (proud of myself for not hoarding the vellum) and added the photo block to the page - I moved it around til I liked the placement.
  • I used some Thickers from Pebbles to add the title (3rd stash product) and added a gold arrow from the same pack.  This helped frame the photo with the gold elements.
  • I added phrase stickers from the Maggie Holmes Shine collection (4th stash produt) in between layers at the top of the page - this effectively creates extra layers without a lot of bulk or patterns.  And the phrase stickers help capture the story I was trying to tell.  I added a gold arrow to the embellishment cluster at the top of the page.

  • Next I build the embellishment clusters at the bottom of the page and along the side of the photo block using label stickers from the same Maggie Holmes sheet and some vintage Crate Paper stickers in my stash (5th stash product).
  • I finished the layout with gold spatters and some Lemon Lush sequins (my all time favorite sequin mix that I hoard and the 6th stash product).
 I'm not sure the photo does this layout justice - it really is my favorite project in a long time.  And it was so much fun to see what I had in my stash that would work well with the kit to tell my story.  I love my kits because they mean I spend less time choosing coordinating products.  But picking the papers and embellishments was always one of my favorite parts of scrapbooking - this might be the perfect way to have the best of both worlds.

Hope your having a great week - I'm fighting a nasty case of bronchitis so I am not really scrapping much at all.  But I do have a few things to share with you, so stop by again soon. 

Tuesday, January 12, 2016

One Little Word

The concept behind the One Little Word class Ali Edward's offers fascinates me.  Pick a word and use it to help shape your year.  Learn about yourself, grow and accomplish through a relationship with your word.  So this year I decided to give it a try.

The first thing that I learned is that picking a word is hard!  There are so many choices and, because I am me, I was sure I could find a perfect word.  I was really about 90% sure that I was going to use "intent(ion)"  because I wanted to to focus and make intentional choices about where I was going.  But it also didn't seem quite right.

Then I explained the class to my husband - he generally teases me about my "crafty endeavors" and complains about the time and money.  But not this time.  He listened and immediately said "FORGE."  I asked why - he said he didn't know but that the word popped right into his head.

So I did a little research and it turns out that this is the perfect word for me.

  • to make
  • to move forward
  • to build connections
I've spent the last week or so using my crafty time to work through the January prompts in my album. I am using the 6x8 gold striped album available on the Ali Edwards website.

Here is my title page - I am using a wonky heart on its side throughout my album to represent an arrow and a strong heart (somehow both seem relevant to my word in my mind). 

I used the back of the 3x8 title insert to document the story of how I chose my word.  Writing it down made me wonder why my husband thought of this word - maybe I will figure it out this year.  Carson Riutta inspired the use of the floral paper for my definitions page - I loved it when it came in a kit but had no idea what to do with it.  But I love it for this project. 


The next page is titled "The Year Ahead."  I used Ali's prompts but retyped it so that I could use a consistent font throughout my pages.  And I printed it on a piece of pale pink cardstock (the smooth side), and of course couldn't reisst adding a few embellishments.


I love this quote that Ali provided (in her handwriting) in the class materials.  I printed it on a piece of vellum I had been hoarding from the Studio Calico Atlantic collection.

The next page talks about the reason why I chose this word (a little different than the story of how I chose my word) and includes a quote that speaks to my word.  I also included a photo of me (taken on December 30 when I finished work for the year.)  Including a photo of yourself was one of Ali's prompts and might have been the hardest thing for me.


The next pages talk about things I am trying to bring into my life in 2016 and things I am trying to let go of this year.  The page beside it begins to document my intentions for the new year.


The last page related to the prompts is the rest of my intentions.  I include a photo I took on a weekend away with my husband when we were sitting by the fire just being together here - one of my biggest things to work on is transitioning back to being a couple as our last child gets close to moving out.  We have been so busy being parents for the last 23 years that we have forgotten how to be "two."


A 3x8 insert next to it includes a list of action items for the month.  The action items were my own addition.  After I finished the prompts I felt like I had document very aspirational thoughts and nothing very concrete.  I think I will make better progress if I have some very specific things to work on written down. 

On the back of the action items I printed a quote Ali Edwards shared on her  blog at the end of the year about changing your ending - it seemed like the perfect way to end the January pages.

\
This post got long and wordy - thanks for taking the time to read it.  I am planning to share my pages each month and hoping it helps keep me on track this year.

Hope you have a great Tuesday

Monday, January 11, 2016

3 Generations

For me scrapbooking is generally about finding a way to excercise the creative side of my brain.  But the chance to capture special moments is a big part of that too.  And when there was a rare picture of me with my mother and my daughter, I knew I wanted to scrap it (probably for both my daughter's album and our family album) even though the photo quality was poor.

The January Studio Calico kits arrive on my doorstep Friday and I fell in love with all the papers and embellishments immediately.  It is just beautiful and packed full of bits and pieces.I started by pulling some of my favorite papers to work with.


I haven't been scrrapping much so I knew I would have a hard time getting started.  So I went looking for a sketch. The current sketch challenge at Paper Issues was just what I was looking for.


I really liked all the layers (of course) and the angled paper under the photo block really caught my eye.

The angled paper under the photo block in the sketch inspired me to angle all my layers.  And I am seriously in love with the large alphas that are so trendy right now.  These color theory alphas are amazing.  And the alternating colors reminds me a little bit of candy canes - perfect for the theme of my layout. 

Hope you all are getting your scrappy mojo back after the holidays.  I am trying hard - I still have my December Daily to finish and have started working on my One Little Word album (this is a first time project for me and I am super excited), but am determined to find time to make some traditional layouts too.  Have a great week.

Thanks for stopping by.

Friday, January 1, 2016

Stuck!? and Felicity Jane

You know that sketches are one of my favorite ways to get started on a layout.  So when Laura asked me if I wanted to be the guest designer for the January 1st sketch at Stuck?!,  I couldn't think of a better way to start the new year.  And I adored the sketch she sent me - it might be one of my all time favorites.


I love all the layers and all the places you can add fun bits to make the sketch your own.

I was making my layout in December so I decided to do a Christmas layout.  My Secret Santa (I still don't know who it is) at Studio Calico sent me the Christmas kit from Felicity Jane - and it is gorgeous!

 I knew it would be perfect for this sketch since it had so many beautiful papers and fun bits.  And I have to say that the kit and the sketch together were so inspiring - my layout flew together!


The papers in the kit were perfect for this photo of my husband setting up the train under our Christmas tree.  And the kit was so inspiring that I even broke down and did some fussy cutting from the sticker sheet.  Only the alphas didn't come from the kit.

I'd love to see what you make with either the sketch or the kit - so link me up.  I will come leave you some love if you do!

I hope you all had wonderful holidays.  Mine were awesome with lots of family time but they were super busy.  I am looking forward to getting back to making layouts and to sharing them here in the new year.

Thanks for stopping by.